Lesson #2: Efficiency in quilting

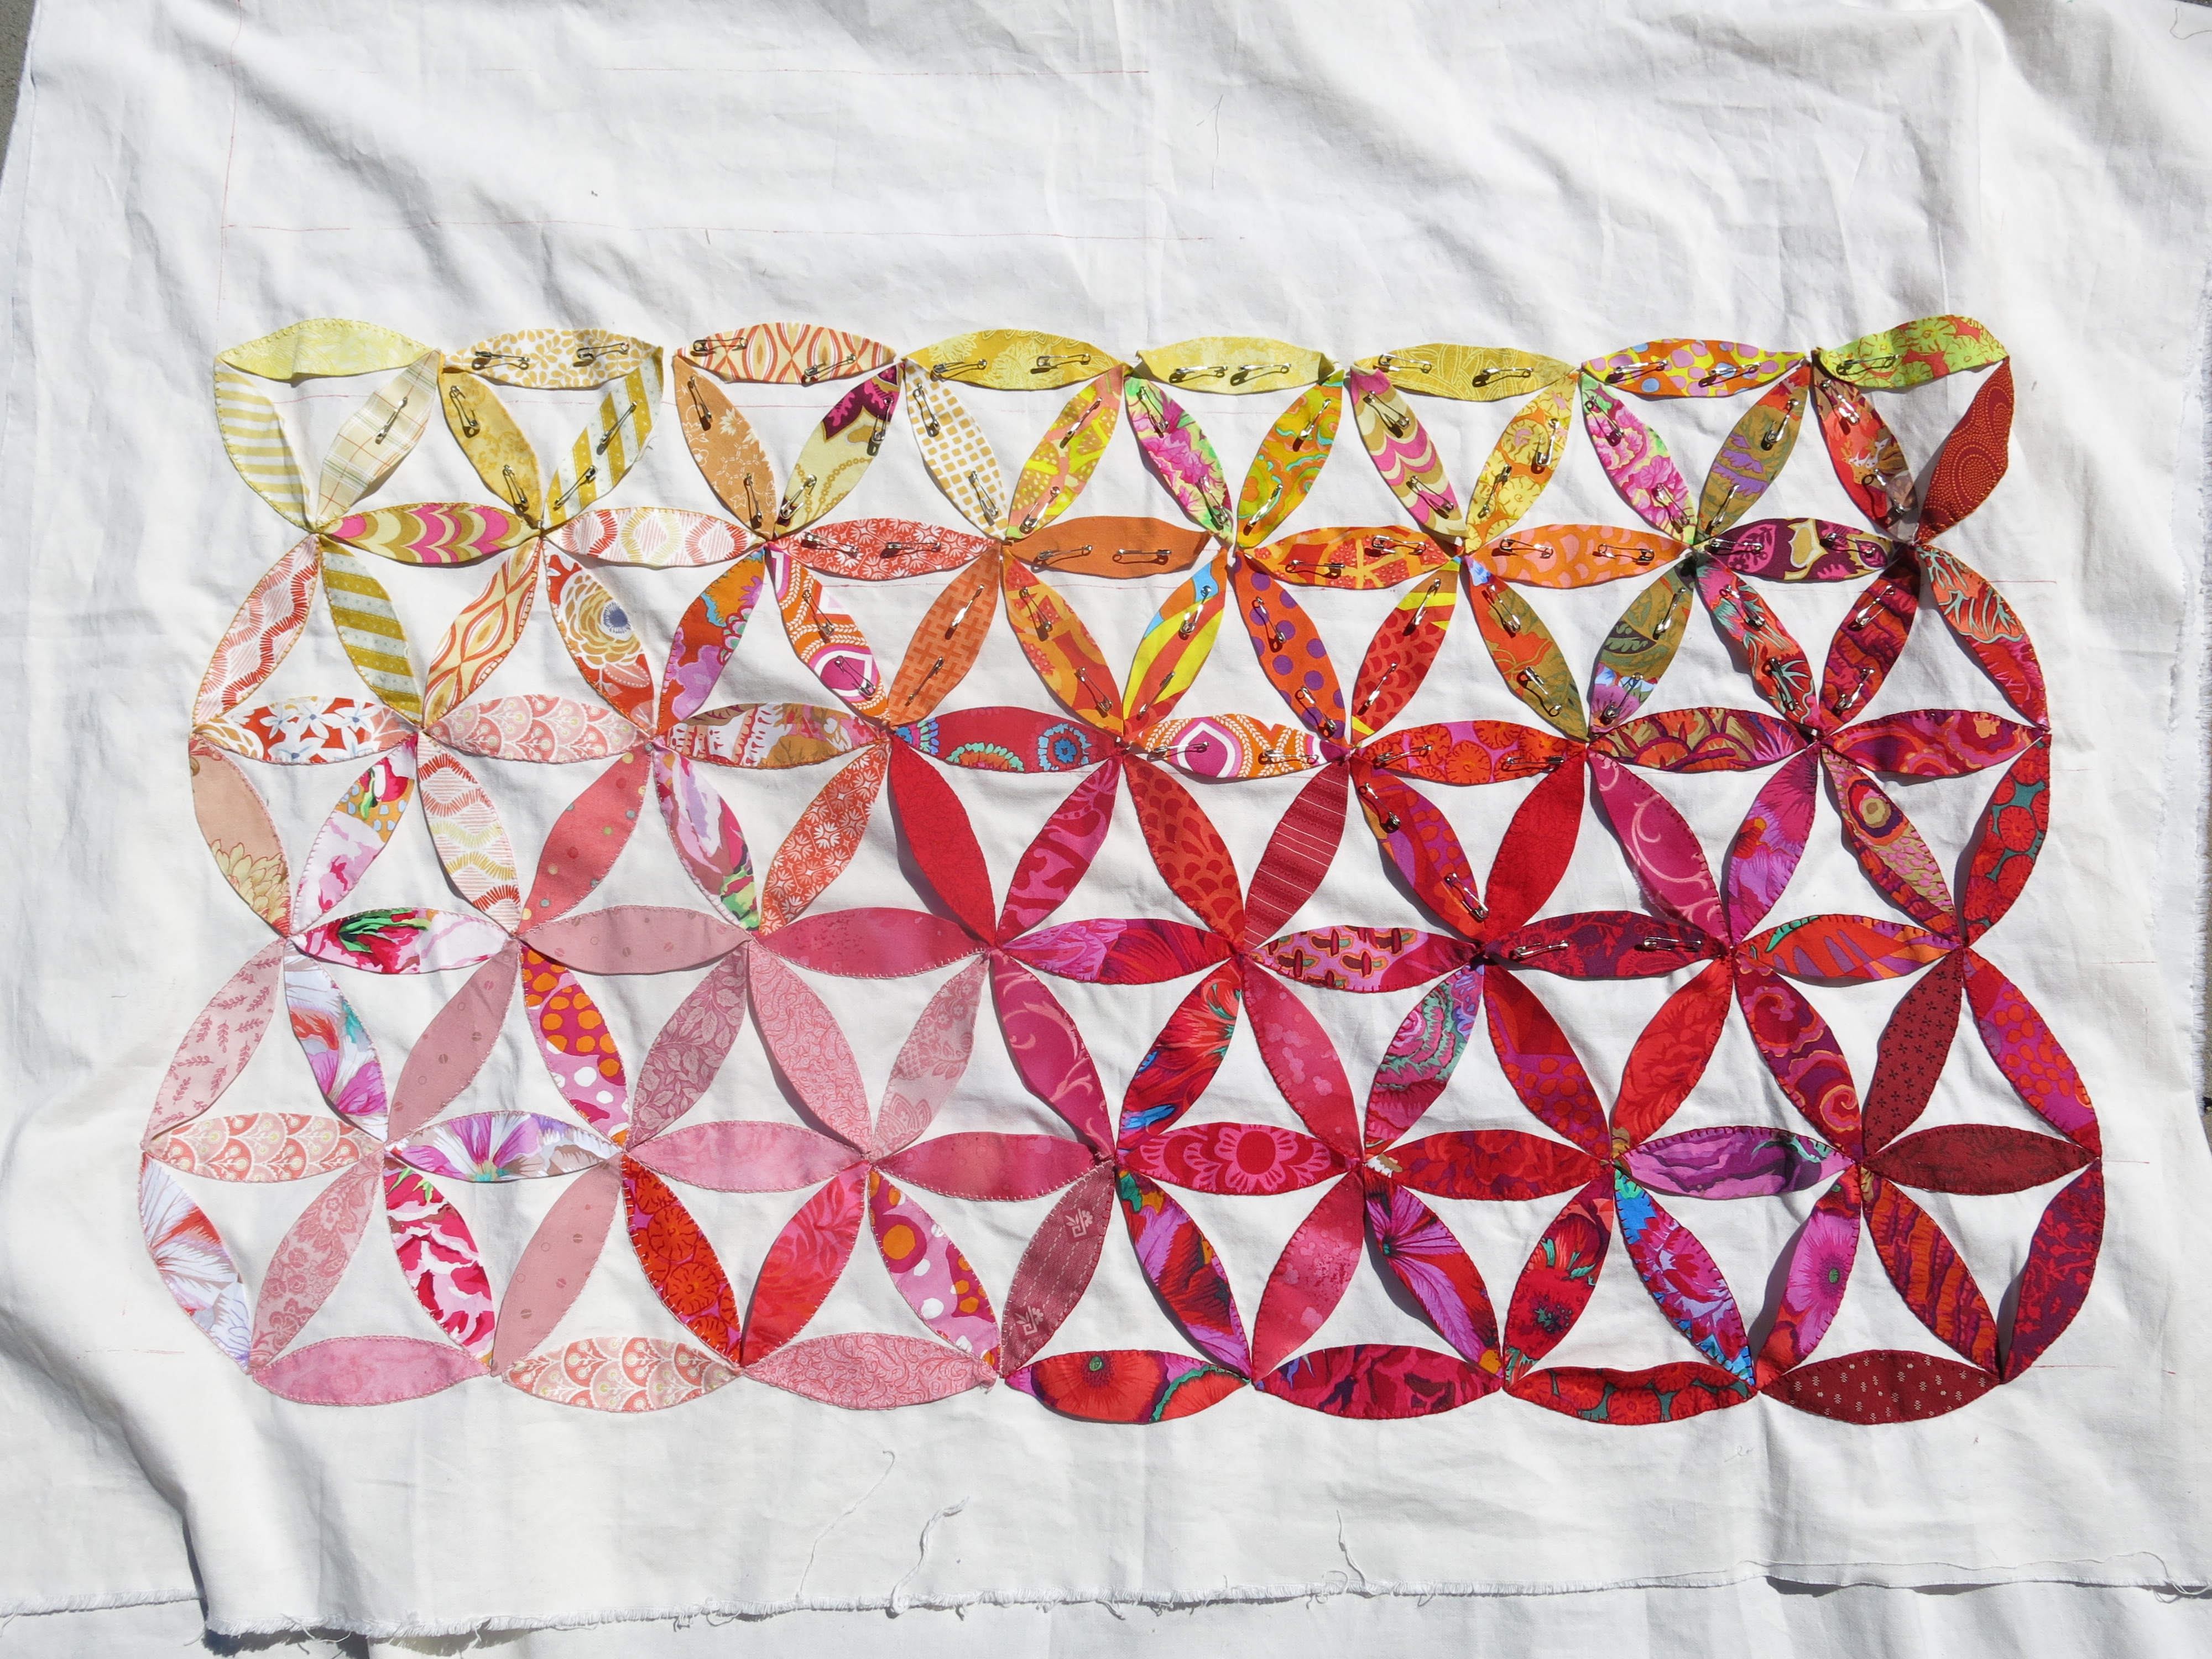
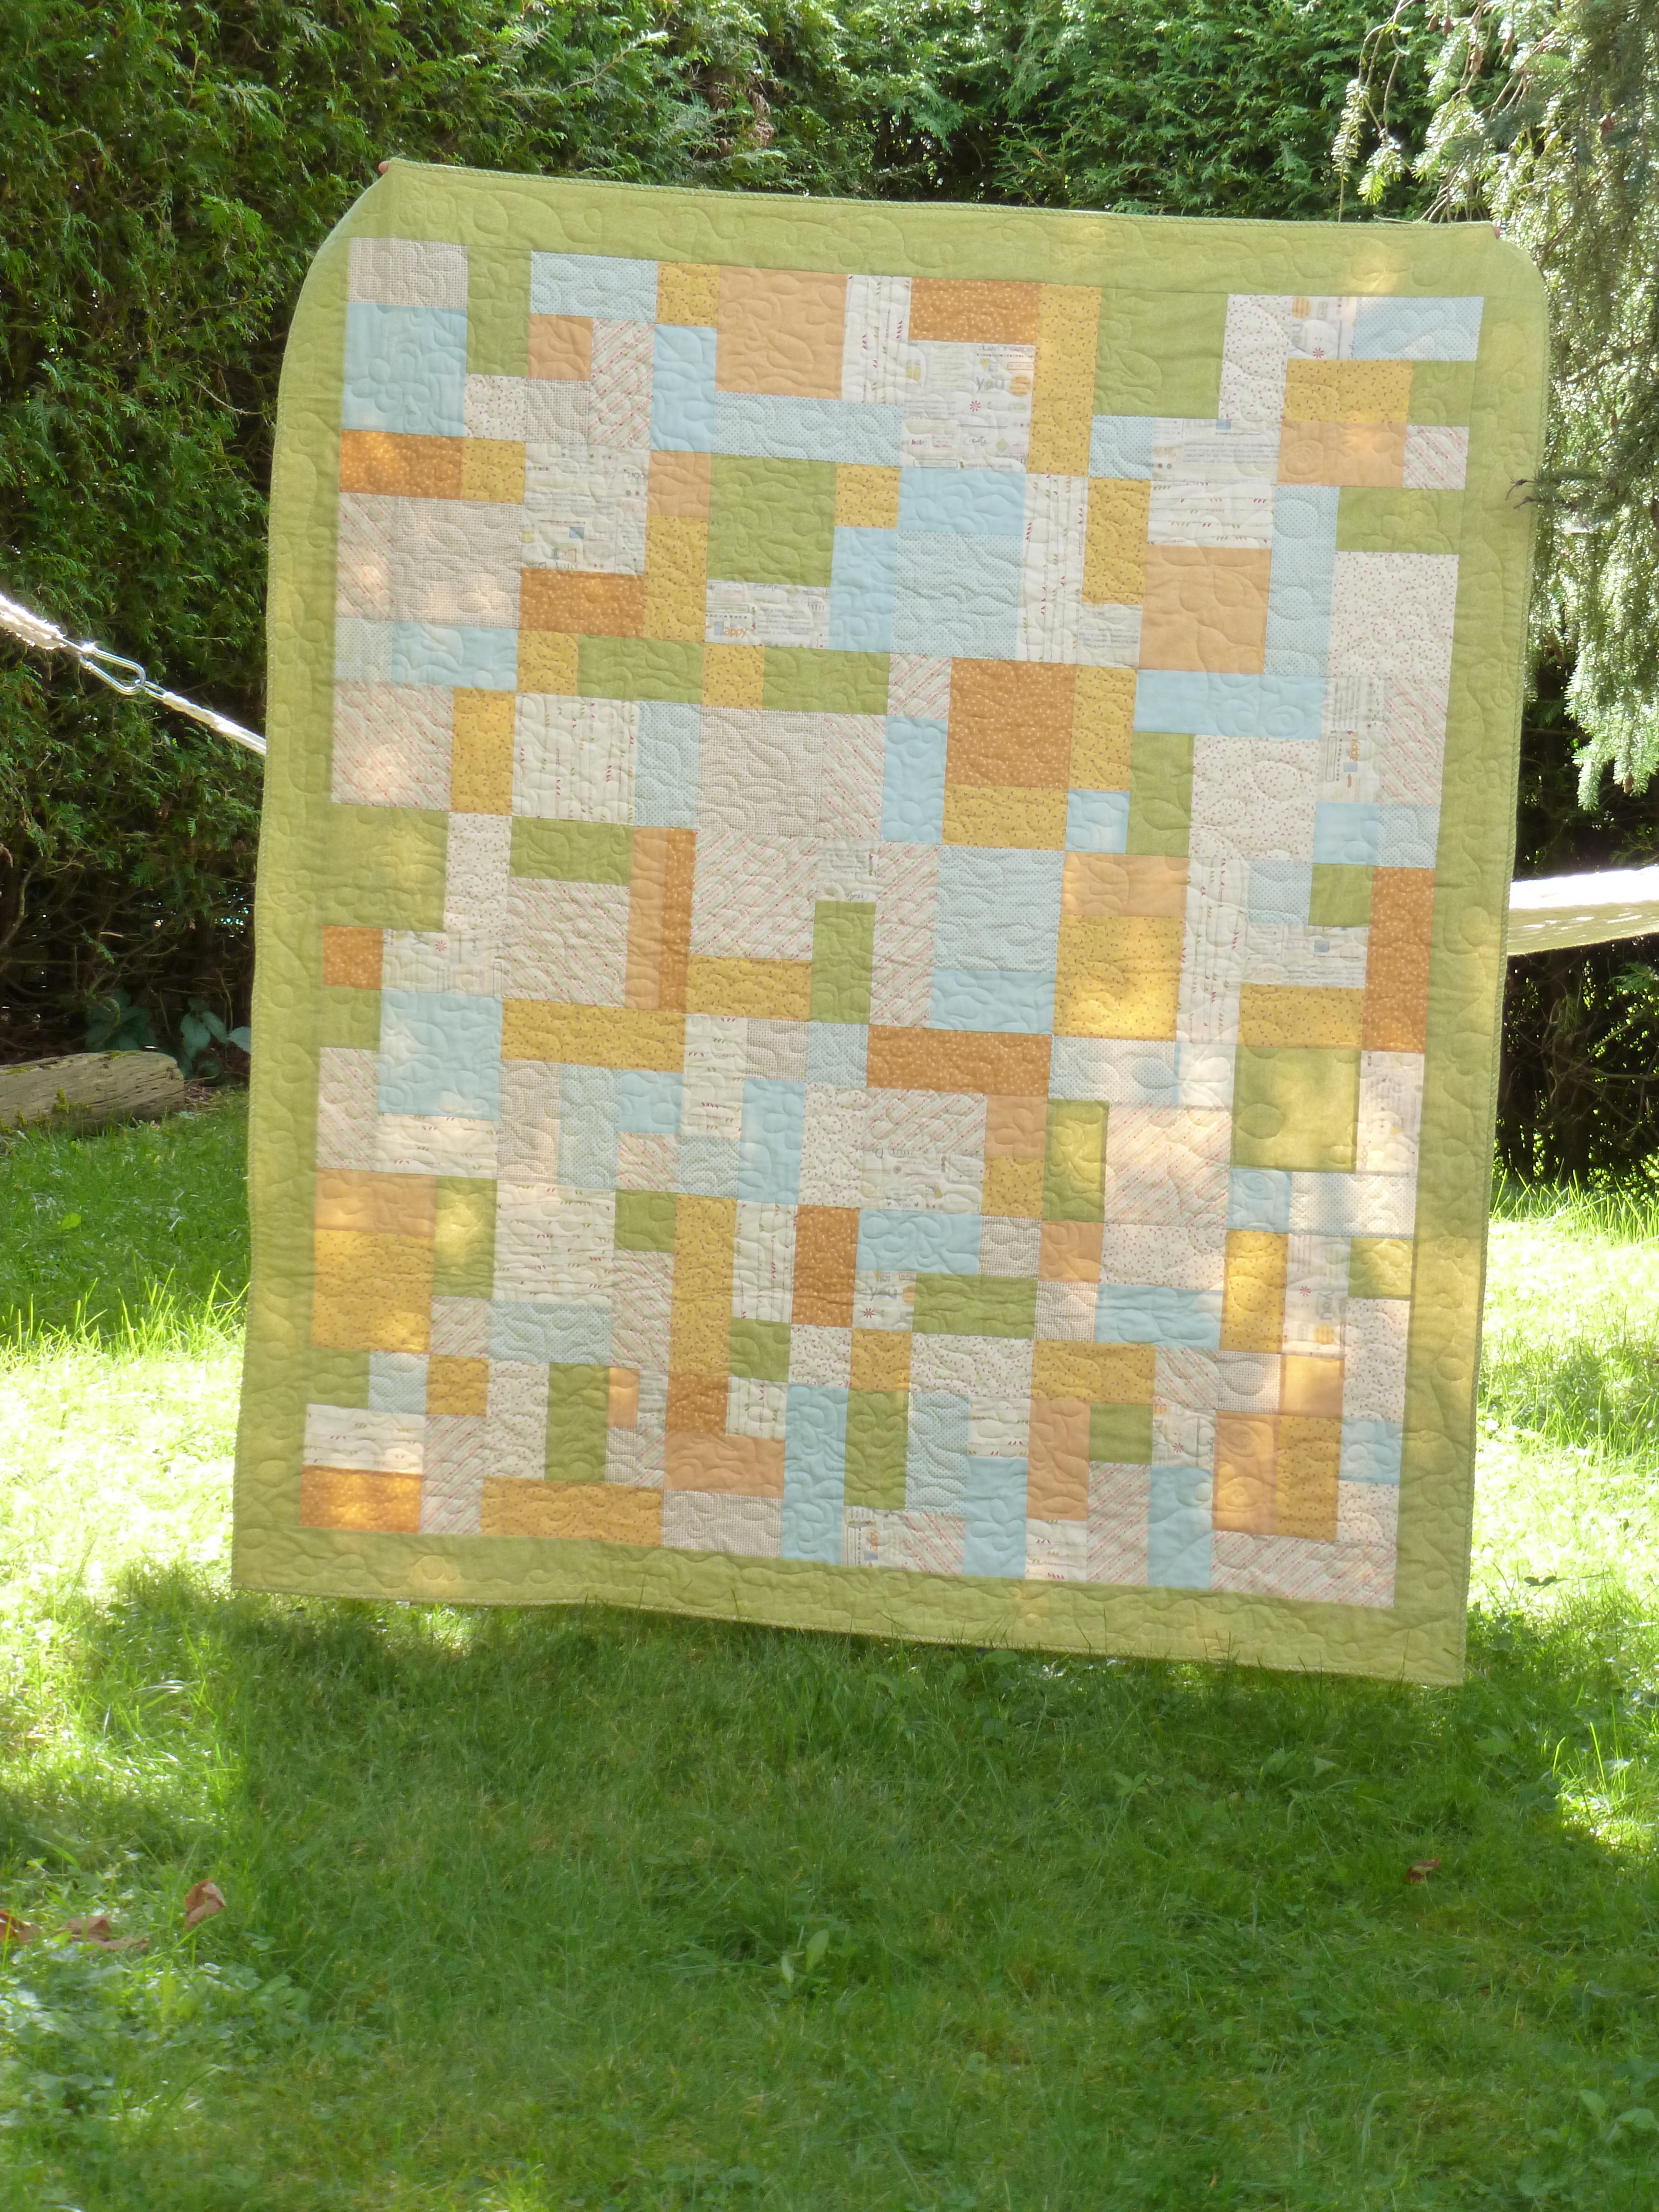
I had two baby quilt tops that had been sitting in my sewing room for almost year, waiting to be quilted. I had limited time on the long arm machine this weekend so my mom suggested loading both on the machine frame to speed up the process. I was skeptical at first, but I thought I’d give a try. Here’s what I did: I sewed the backings together. They each had about six inches to play with on the length so I wasn’t too worried about losing some fabric to the seam. I basted the two tops together so I could separate them on the frame.

Double quilt top

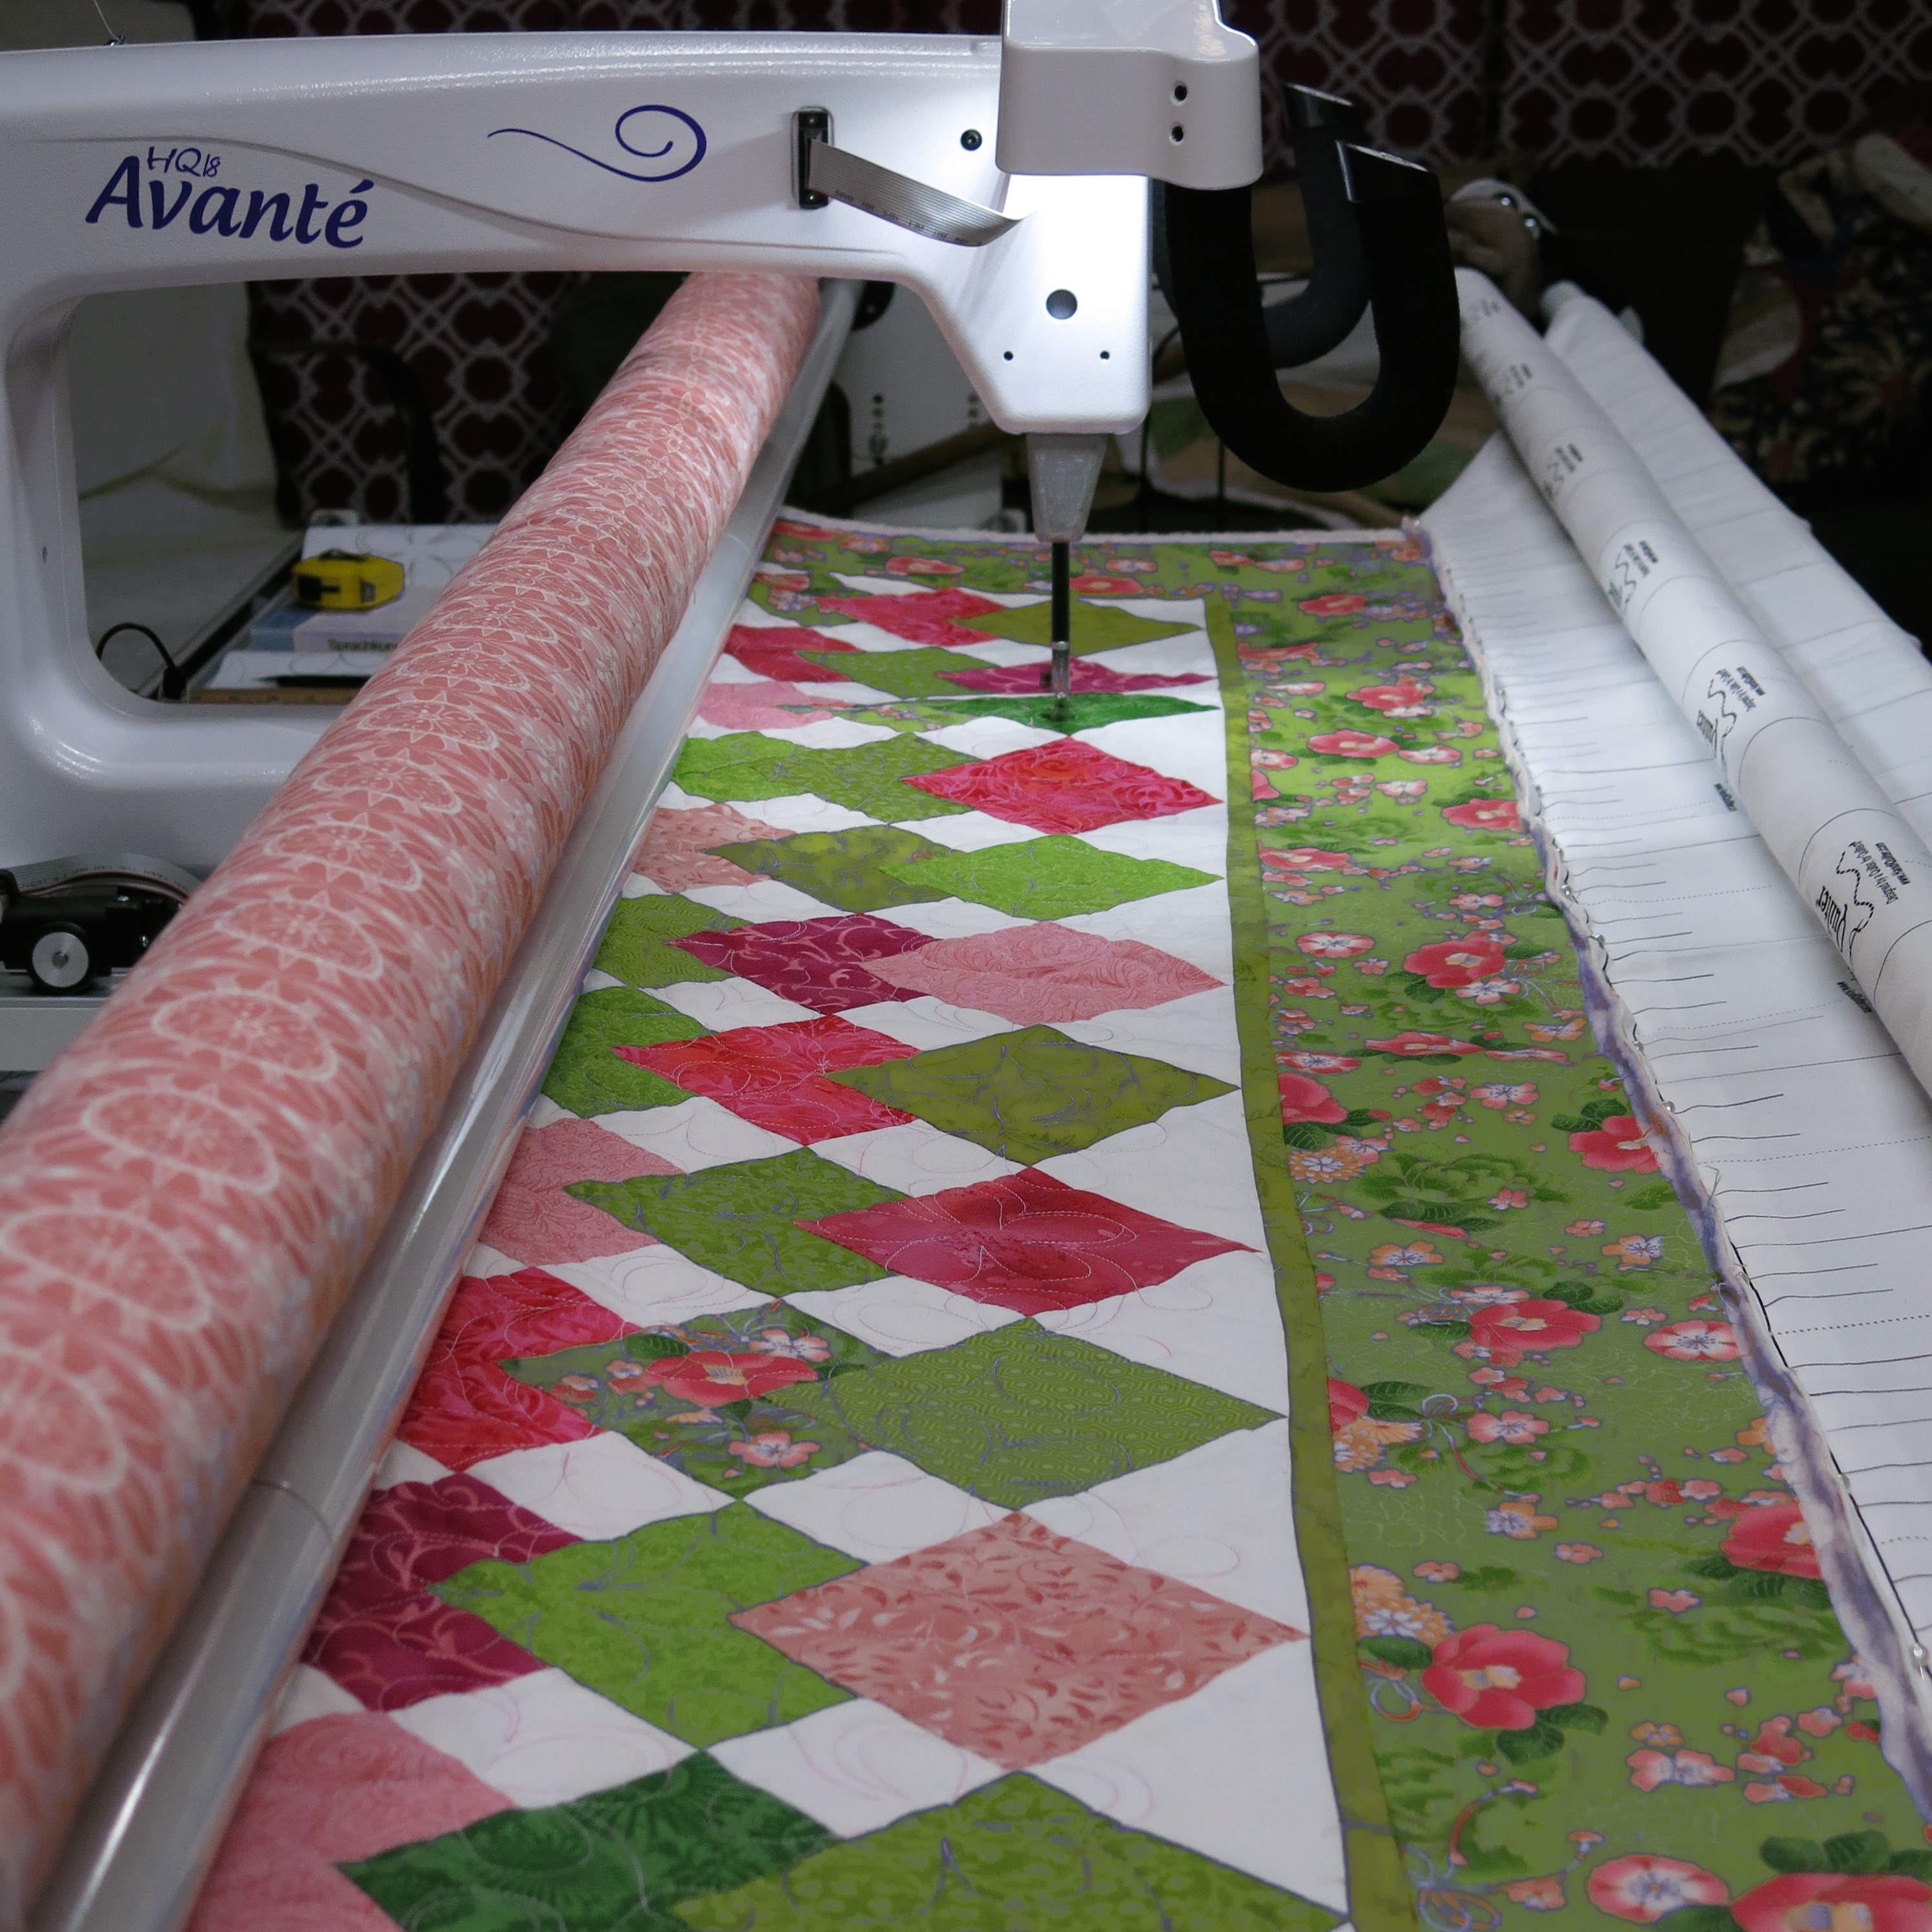
I loaded the backing and double-top onto the frame. I think my math was non-functional when I made the first backing, so it was the same width as the quilt top. To make sure these lined up, I loaded everything so that this quilt would be done first and had to be extra careful of the edges.

Backing loaded onto the frame

The bungee clips got in the way a lot, so I will probably trim these edges about an inch so that it looks nice. I proceeded to quilt as normal until I got to the end. At this point, I took out the basting and rolled the second quilt back out of the way and finished quilting the first top.

Taking out the basting

From here, it was easy since all I had to do was pin the second quilt and continue the machine quilting as if it was the only one on the frame.

Starting the second top

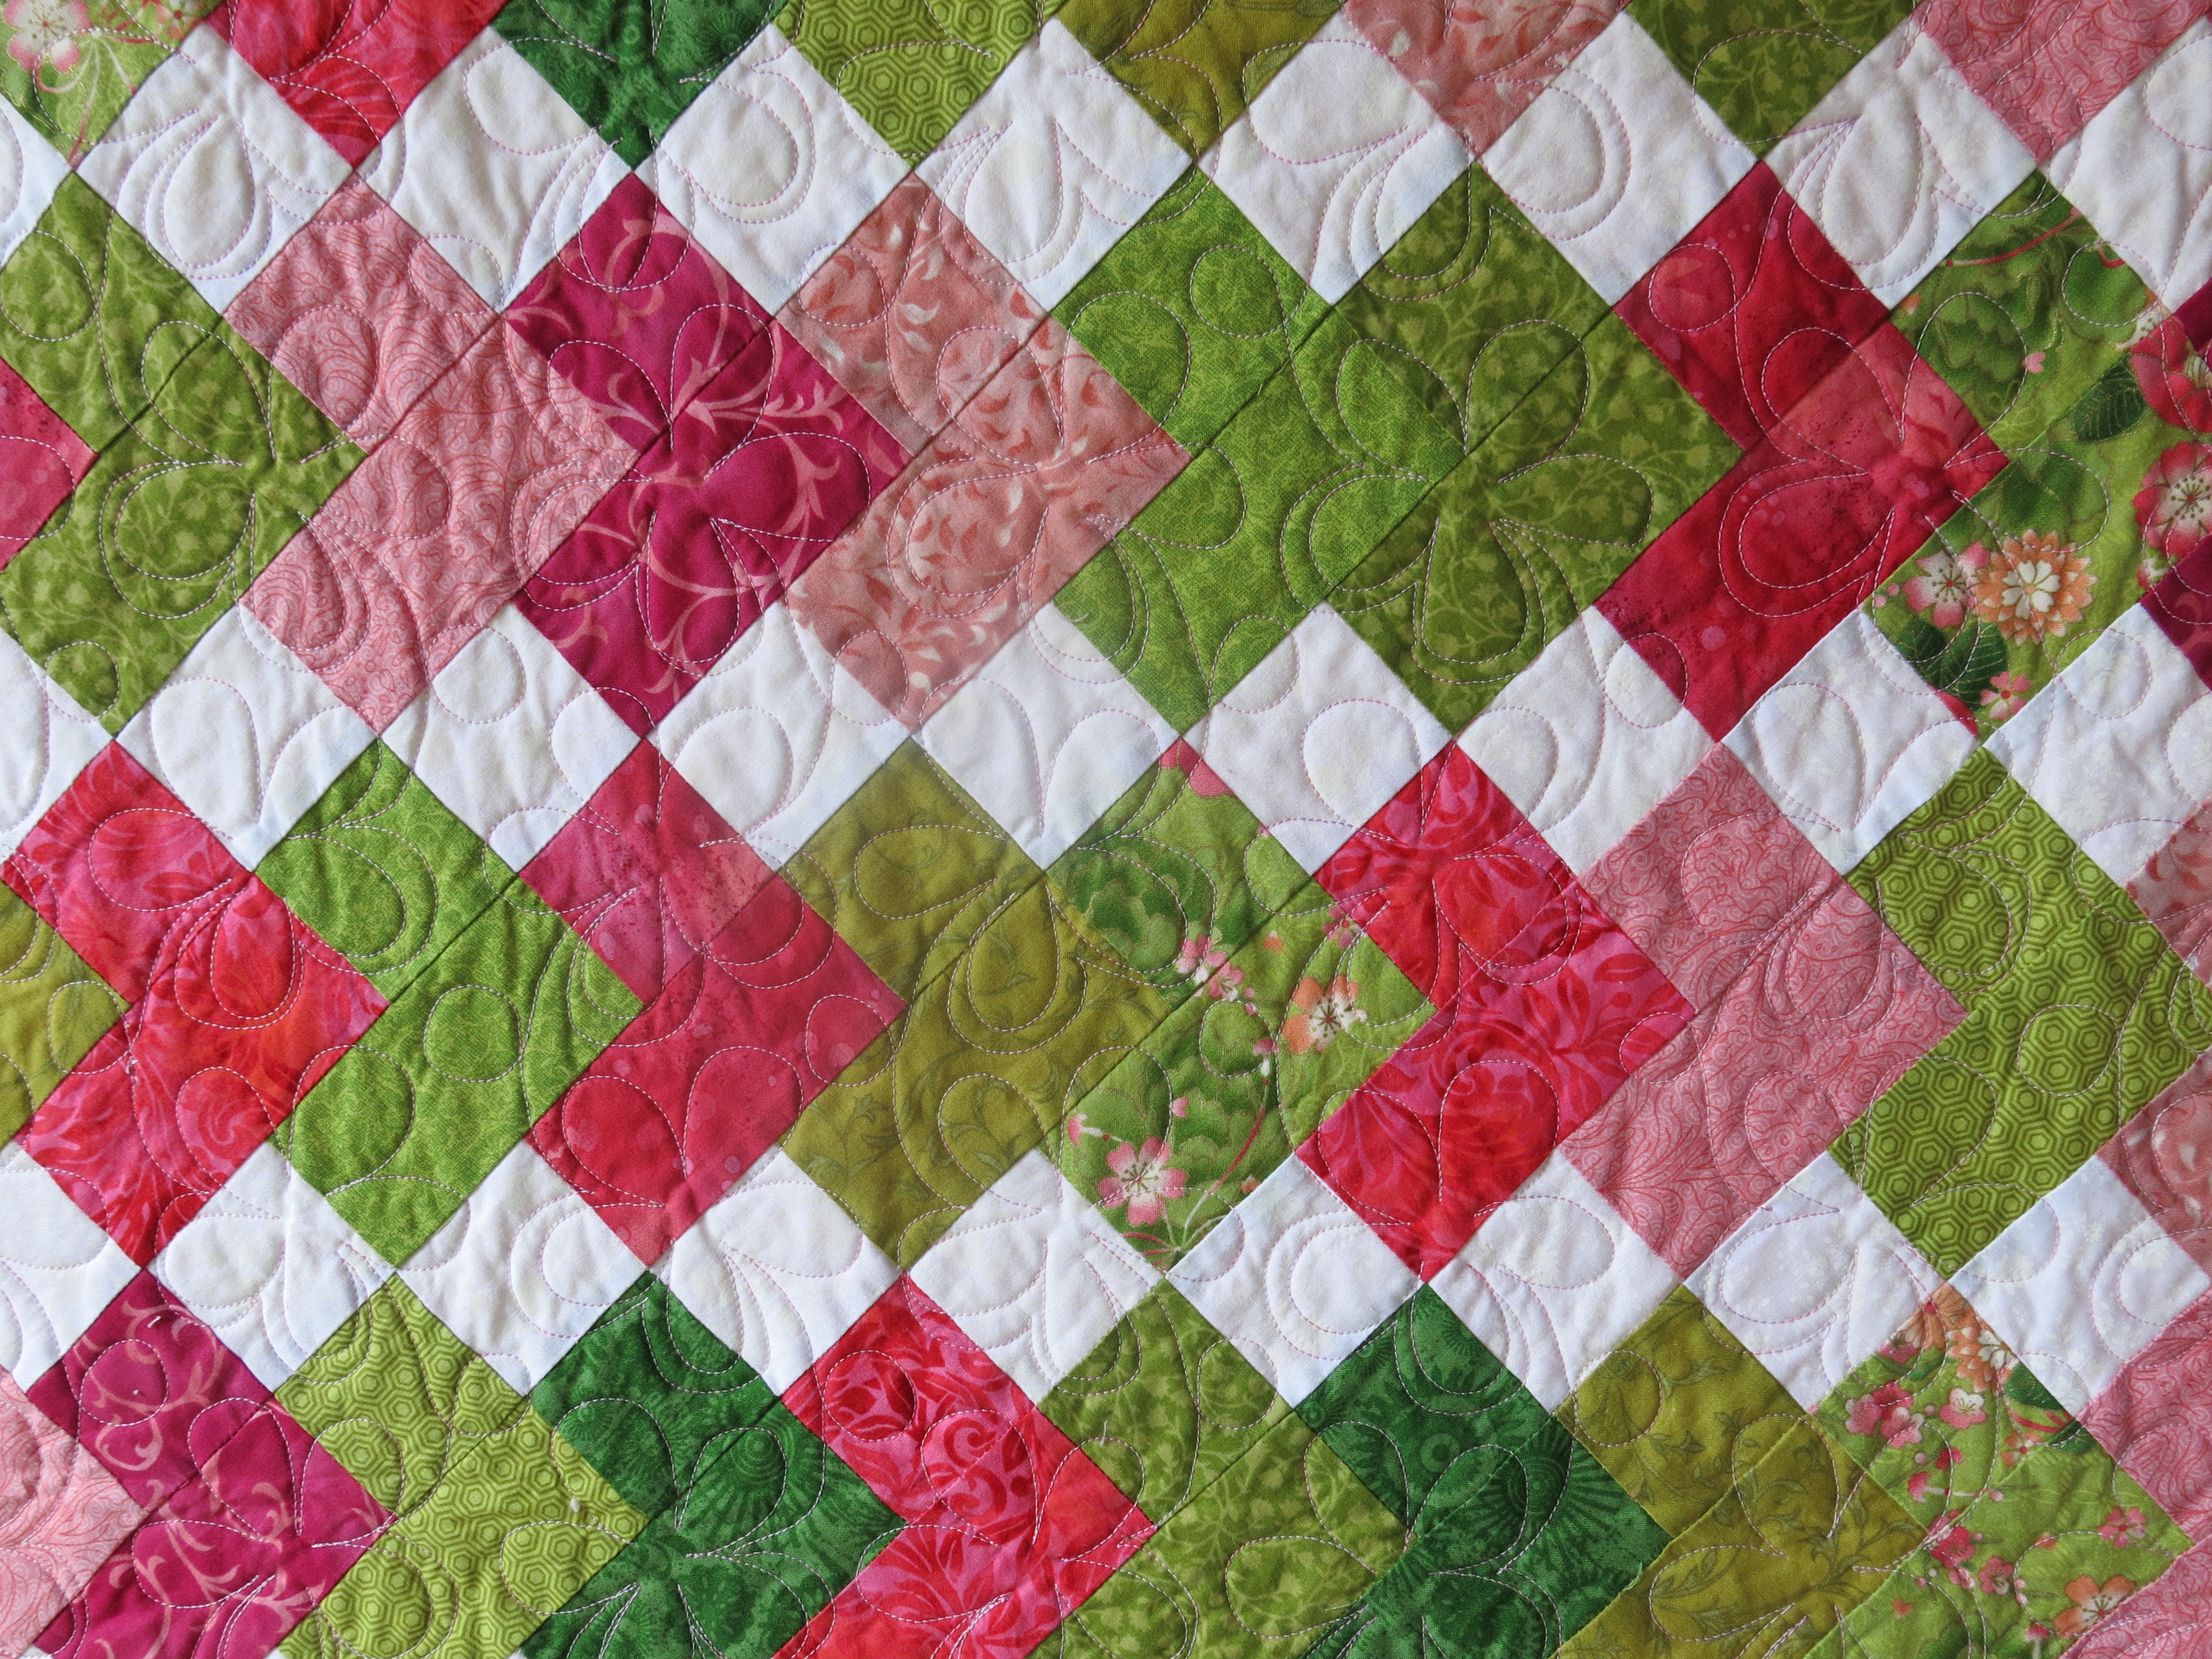
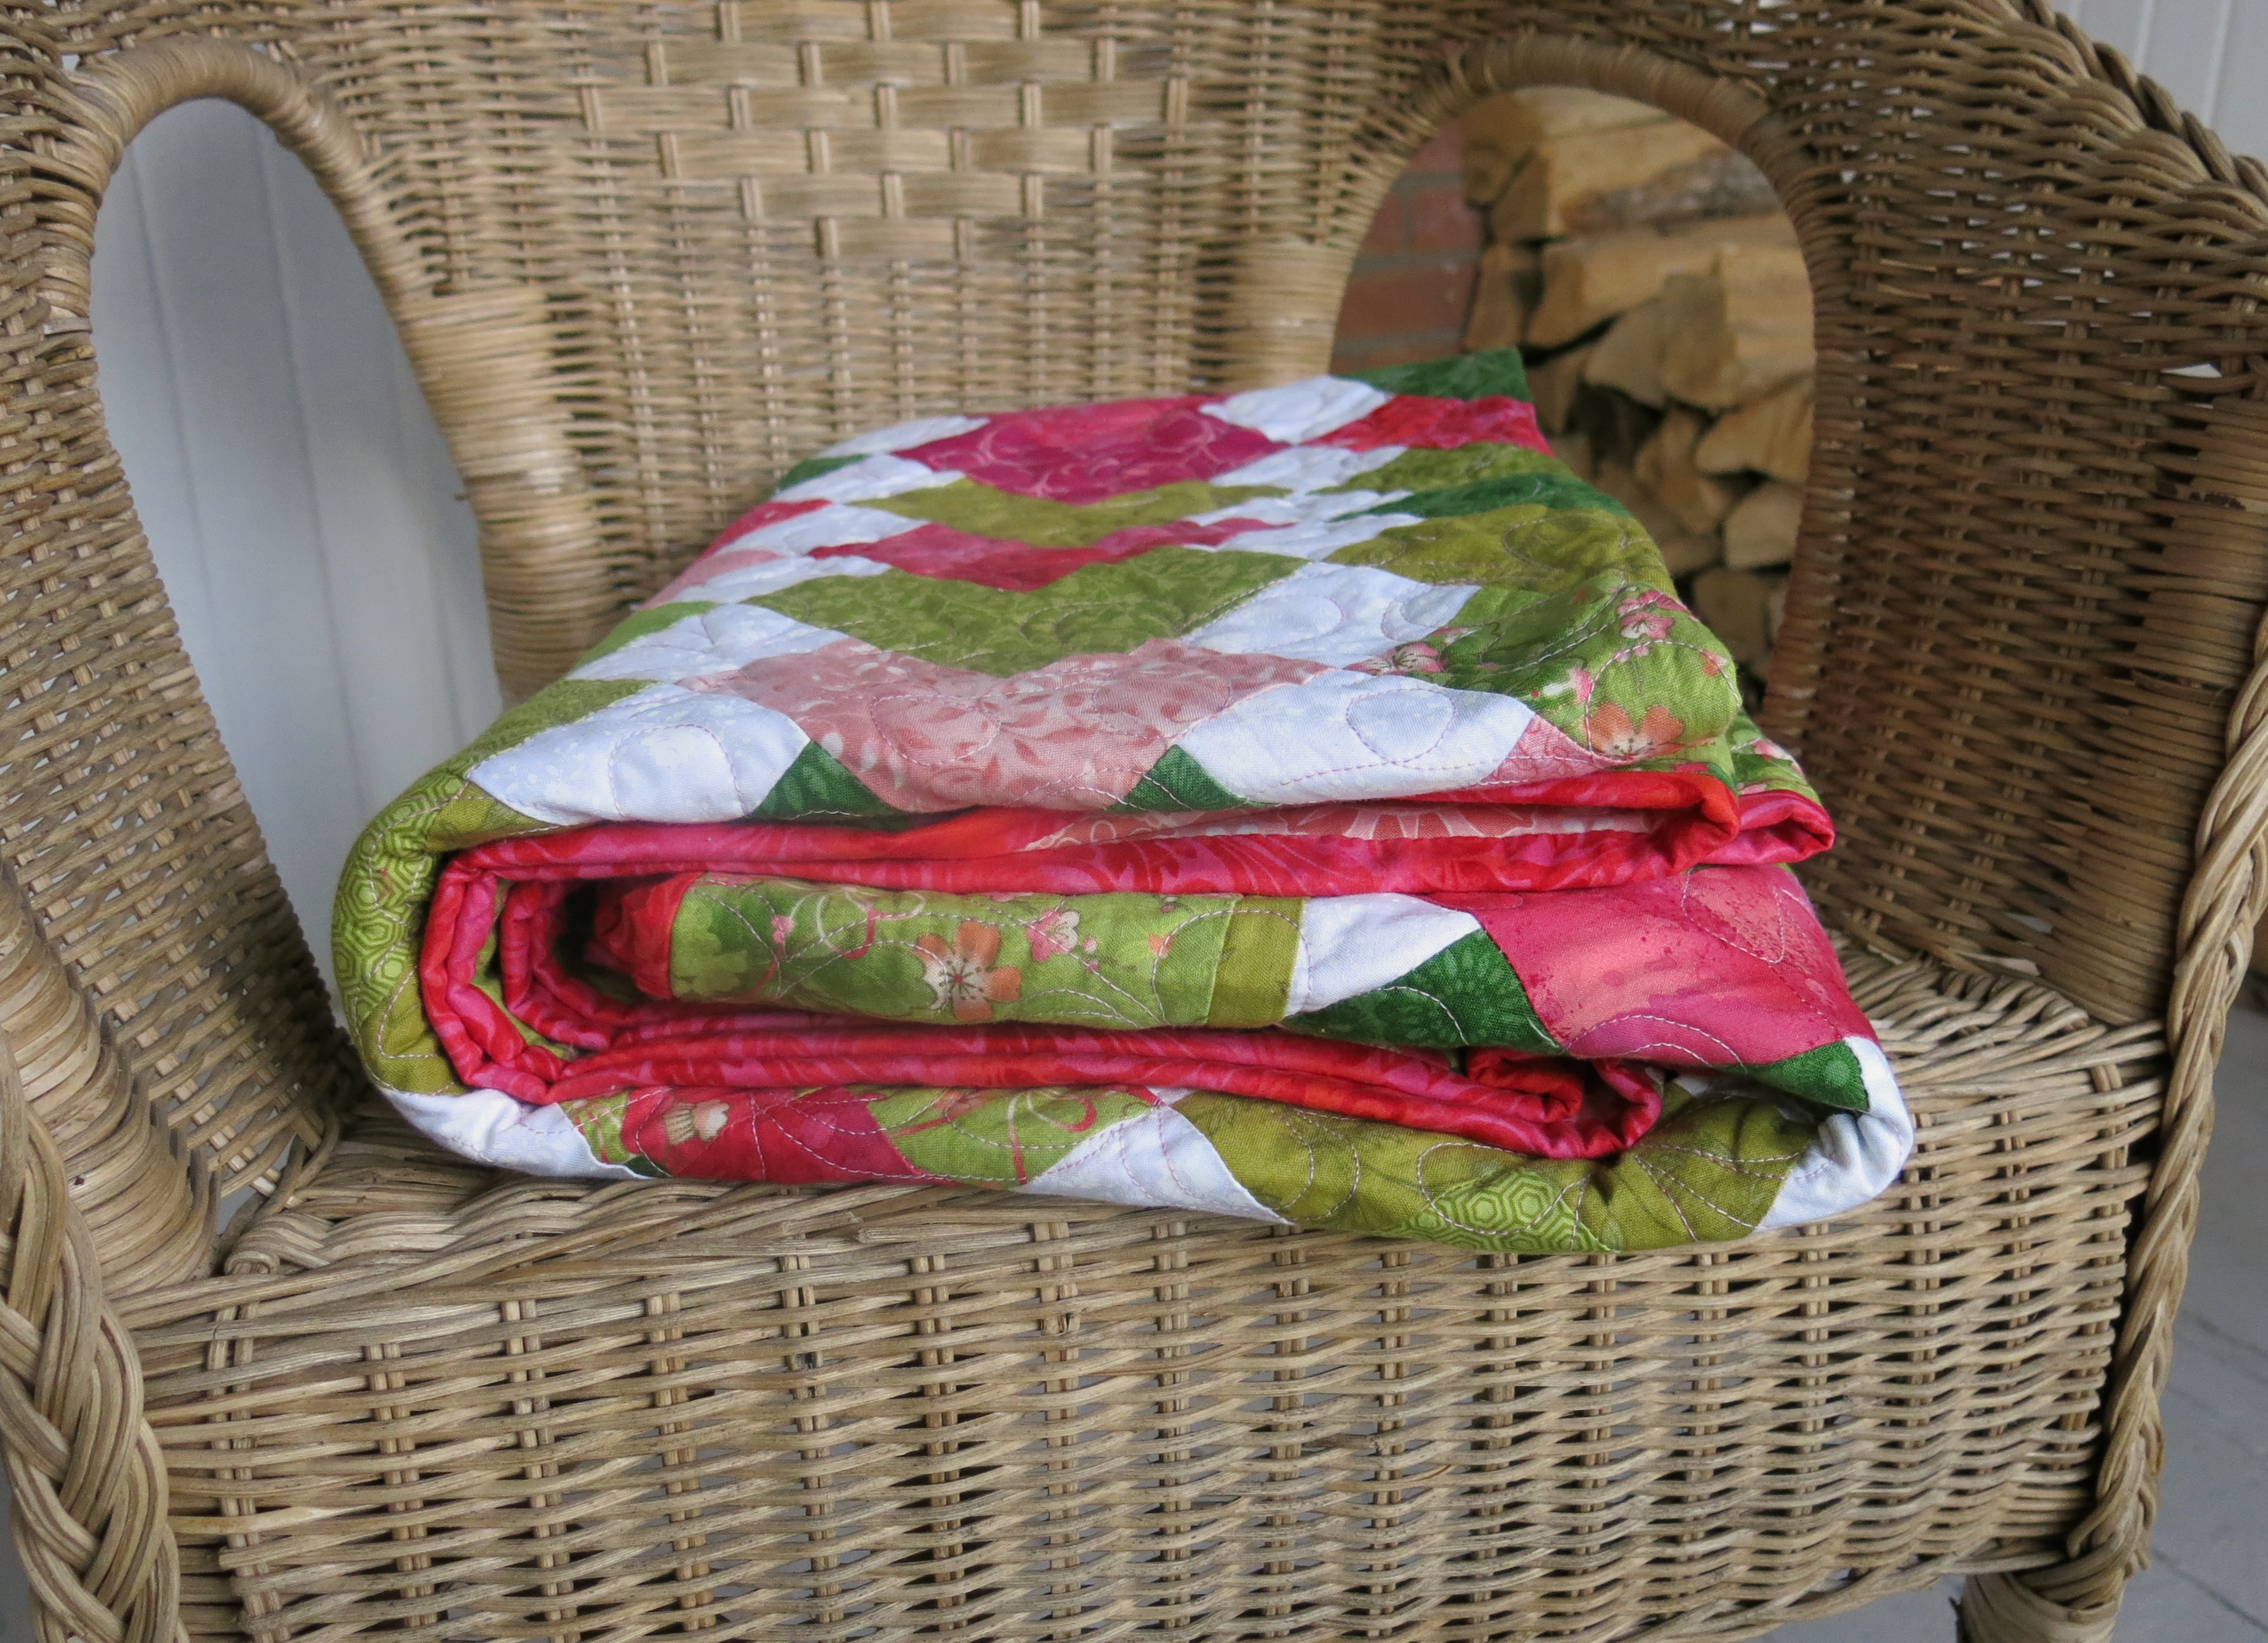
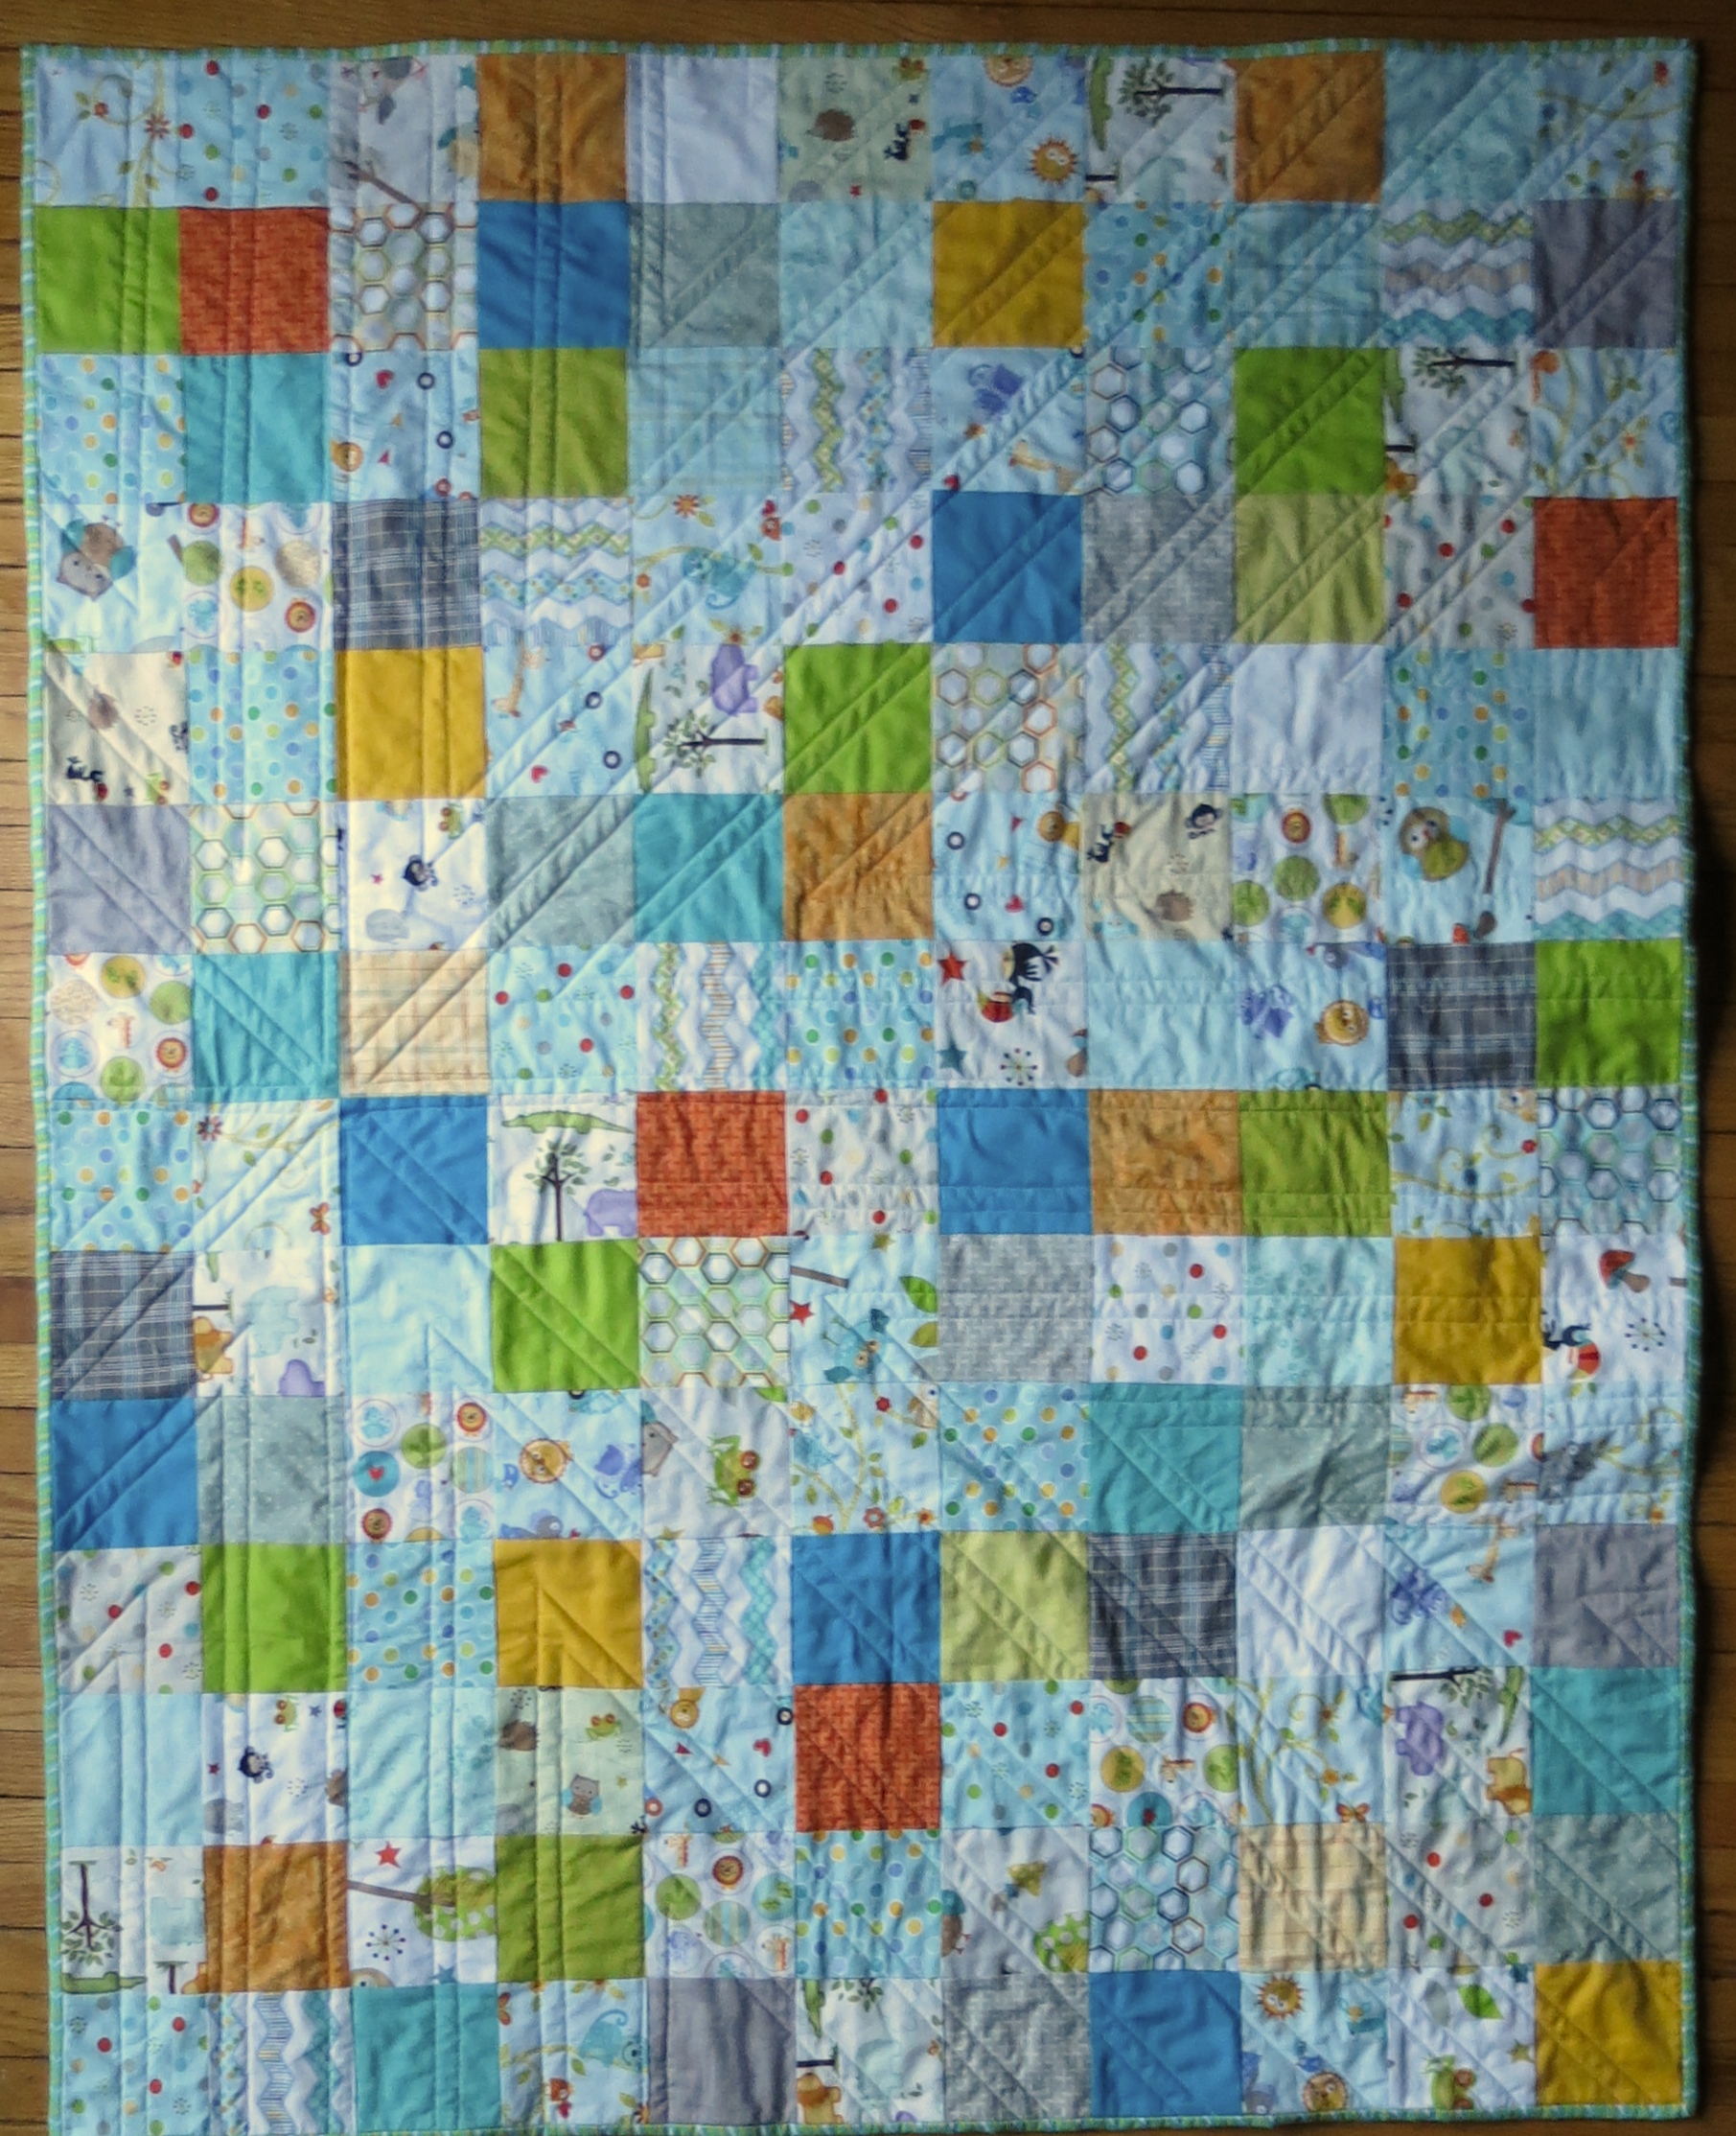
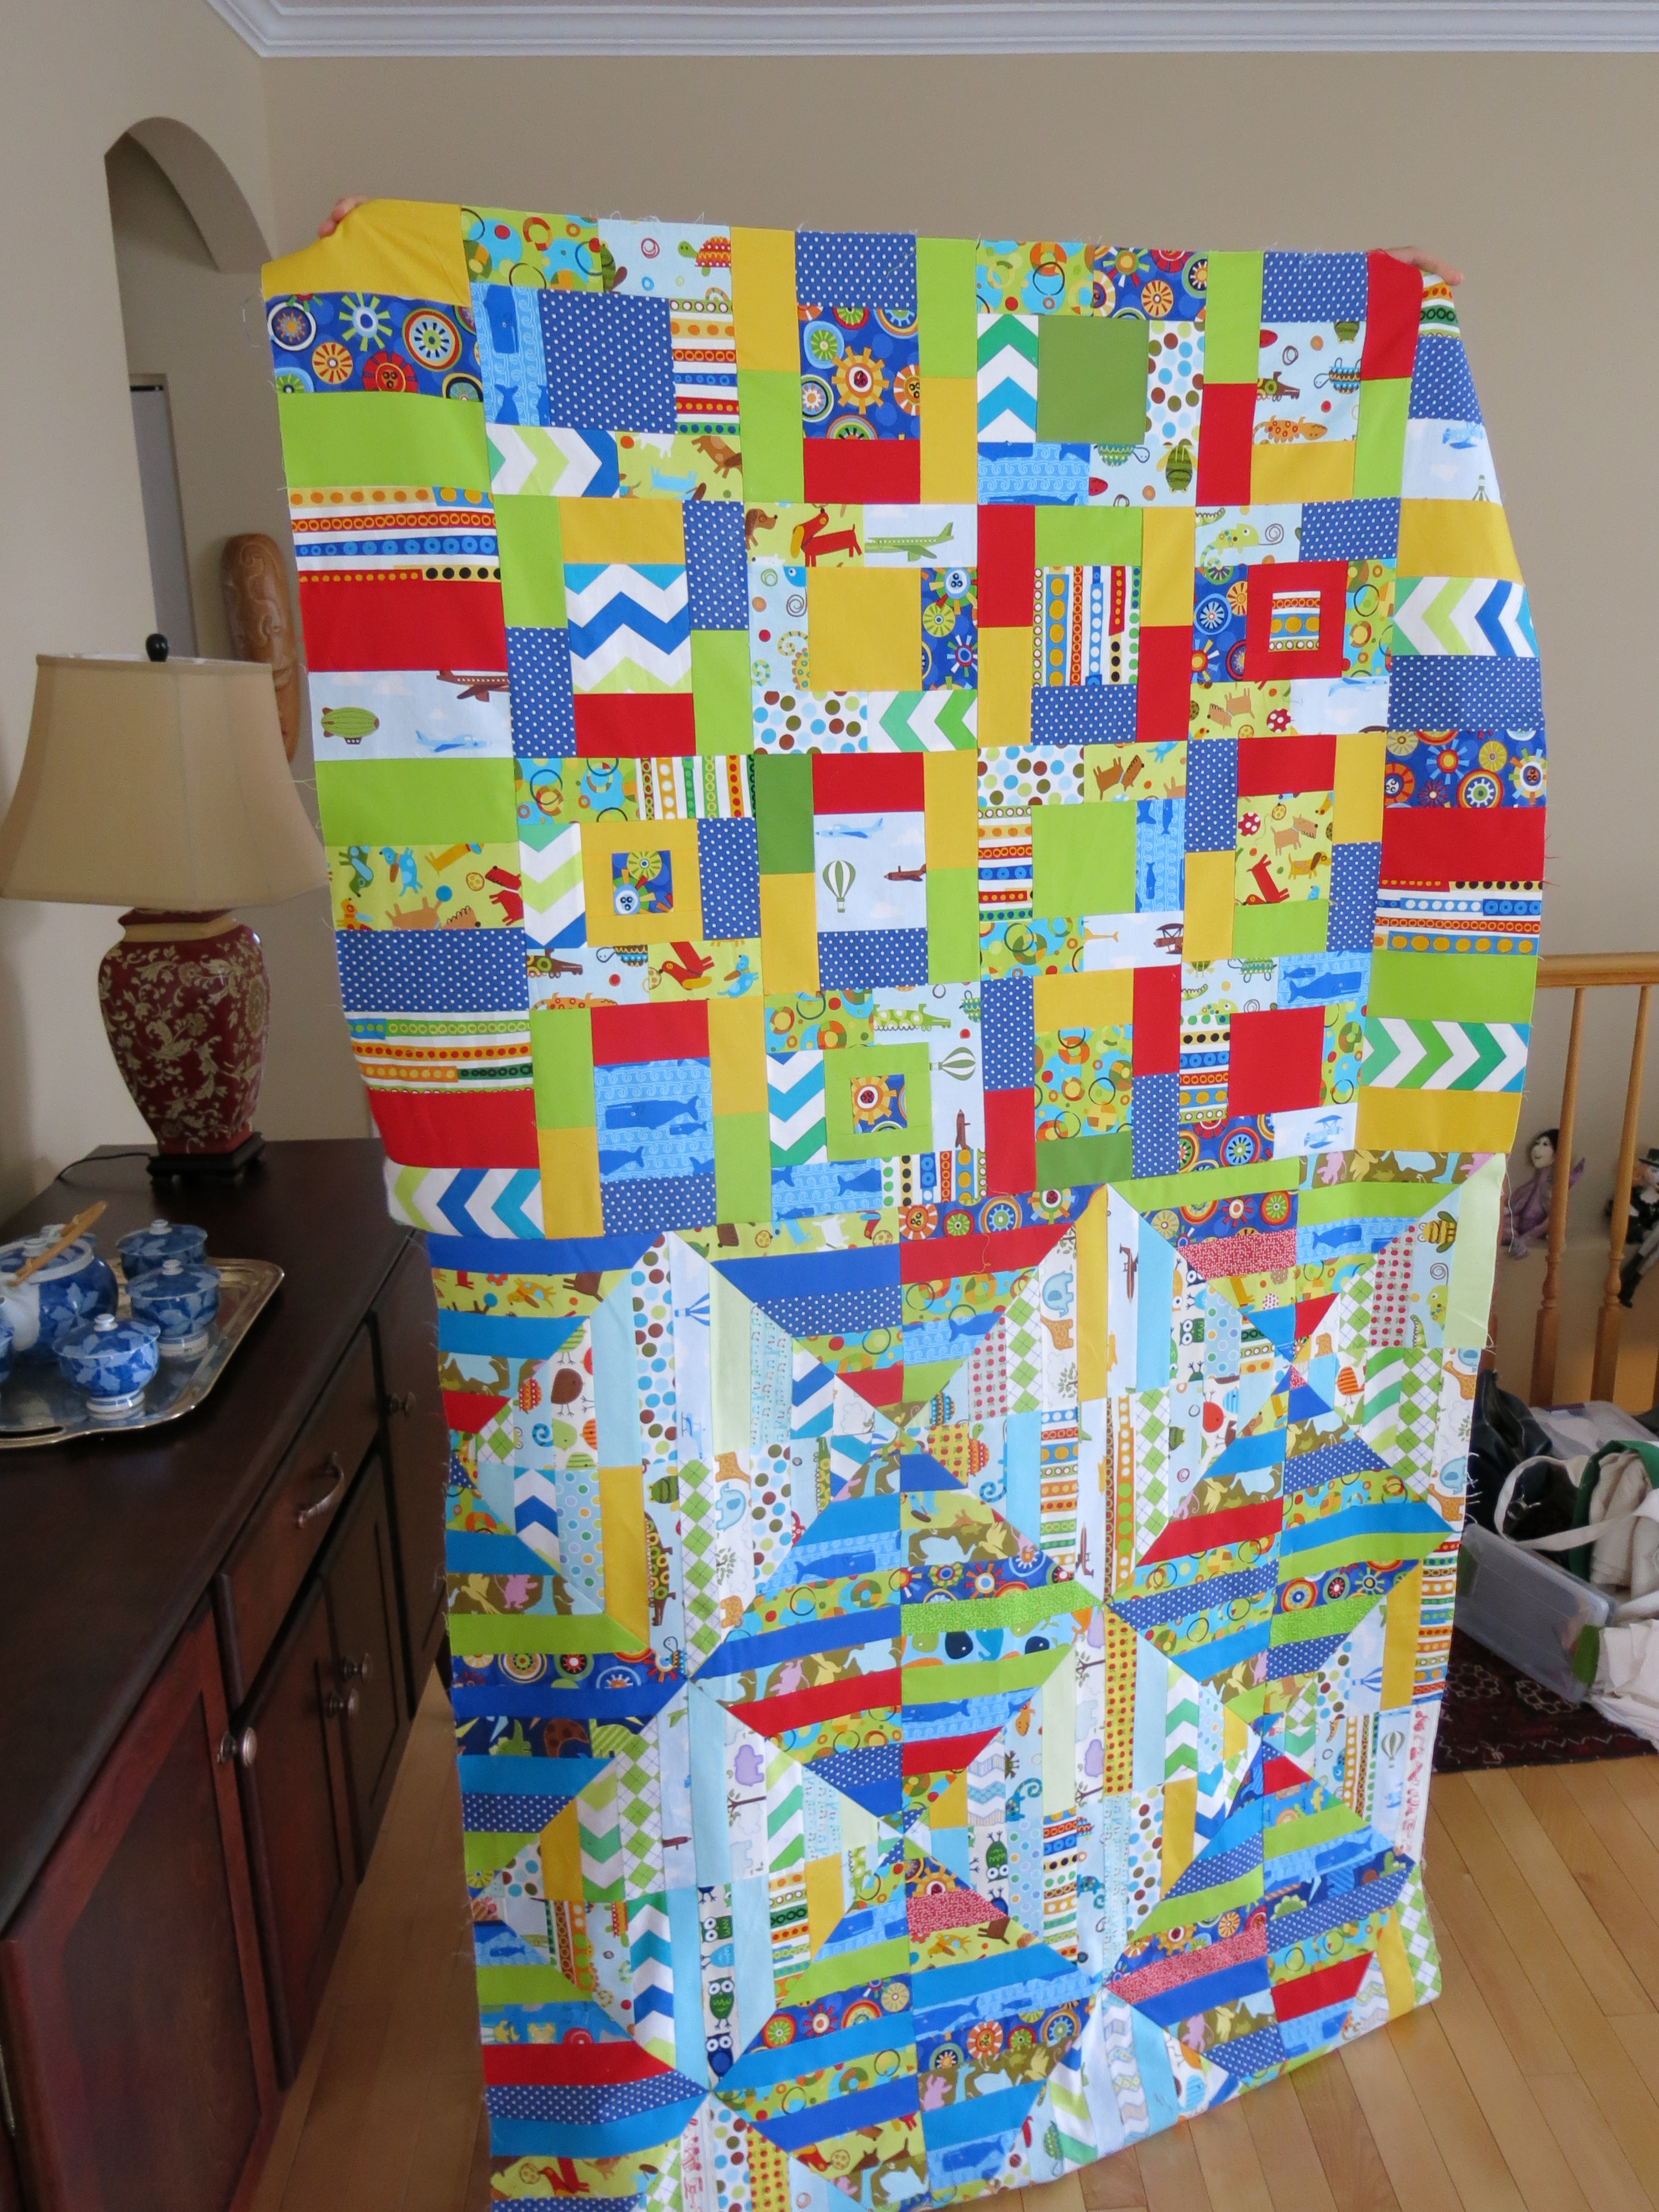
A few hours after loading both quilt, I was finished and had one mega-baby quilt!

Mega-quilt   Mega-quilt back

All that’s left to do now is to trim the excess fabric and batting and bind the edges. I do think it was quite a bit faster, and it’s nice to set up the machine once and keep working through. I promised to credit my mom (Michèle) – so thanks for the time-saving idea, Mom! I will definitely be doing this again!

Emily

p.s. These quilts are numbers 19 and 20 tops completed on the long arm machine since we got it last summer!

Finished quilts!

Joseph’s Coat: update no. 1

I’ve started sewing all the little pieces and am working my way through the orange fabrics now. Most of the pieces are stitched on one side to hold them in place as I work on the section. I was originally using applique pins to keep the pieces in the right position until I get to them, but the pins kept falling out or poking me so I’ve switched to basting safety pins.   Here is the progress:

The progress so far

And a bit closer to see some of the thread:

Joseph's coat detail (update 1)

I think I’ll have the top done by the end of the summer (fingers crossed), so I’ll keep you all posted!
Emily

Spring Fling

I finally finished this quilt! I found a pink floral print on a green background that I loved and picked plainer prints to go along with it. The floral print is mainly used for the border, while the plainer fabrics make up the busy centre.

I first starting piecing it a few years ago using the ‘Cheap Trick’ pattern from Miss Rosie’s Quilt Co. (altered it slightly to increase the size). The quilt top sat for a few years awaiting completion, so  when we got the longarm machine this was the first project I attempted.

Whole quilt

I called it Spring Fling because of the bright and cheerful colours, and even got around to embroidering a label.

Quilt tag detail

I used a pantograph for the quilting pattern to create a design of flowers and loops. A closer view of the pattern:

IMG_1513  IMG_1546


I used a bright pink fabric from the patchwork as the binding. There is something satisfying about a neatly folded, finished quilt!

IMG_1539

– Emily

Edit: I found the picture I had of the quilting in progress! Just over one row left to go!

On the longarm


Baby quilt for a friend

I have finally finished (and taken pictures of) a baby quilt for a friend. I’m working on improving my quilt photography, so please forgive some of the images – I don’t quite have the hang of perfecting the colours and lighting yet.

I started off with a simple square pattern. The quilting is more visible in the second picture.

Squares side Squares side (flat)


I wanted to do something fun for the back, and used this post (by Better off thread) as inspiration. I’ve wanted to try a lone star pattern for a long time and thought I’d use this opportunity to attempt it on a smaller scale.

Lone Star Back Hanging


The image below is a better representation of the colour.

Lone Star Back


This is the best picture showing the actuals colours of the fabric. I managed to make use of the last remaining day light, which seemed to help.

Folded Up

I joke that it’s the ‘mullet quilt’: business in the front and party in the back! It is finished off with quilting along the star pattern and a hand-embroidered label. Two sided quilts are so much fun!

– Emily

Bits of thread everywhere! (but not anymore…)

The way my sewing table is set up there is no room for the garbage bin within arms reach when I am sitting at my machine. It gets in the way of my feet or the ironing board and inevitably gets moved off to the side and I end up with little piles of thread like this:

Image

These piles then seem to find their way onto whatever I’m sewing, my clothes, socks and somehow every corner of the house. I finally decided to solve the problem by making a thread catcher. I found a great tutorial by The Sewing Chick and I set to work. I used Essex yarn dyed linen and cut the rectangles from my scrap bin.

Image

It came together very quickly and almost doesn’t need a lining.Image

I’m very happy with the final product and have already put it to use!

ImageImage


A nice and quick project for a lazy afternoon. Happy Victoria Day!

Emily

How we got started

I thought that I would explain how we all became the Dionne Quiltuplets. My mother, Lise, was the first mentor to my two sisters and me (Suzanne, Michèle and Natalie).  We all learned to sew when we were young; we were often found making dresses, shirts, shorts, jackets, prom dresses and in the end our wedding dresses etc. When we turned 20, we all received our own sewing machines.  My first sewing machine was a Singer. It did not do many fancy stitches but it would sew and sew.

And as usual, life carried on. Suzanne had a son, Michèle had three children and Natalie had two.  I, Michèle, have two girls who also love to sew and a son who knows how to use the sewing machine.  And at 20, my two girls received their first sewing machines.

Quilting came to us later on.  Baby quilts were made at the birth of Natalie’s two children.  It was great to get together to work on a project. But the real love of quilting began a few years ago.  My father, a wonderful compassionate man, was in the last years of his struggle with Parkinson’s.  When he was in a nursing home, my mother and the three girls would visit him often.  As we all know, taking care of someone you love means there is not much time left to be with the others you love. And so our monthly get-togethers to sew began as a way to support each other and do what gave us life and excitement.  My father has since passed away, but we still get together.  Our group now includes Lise, Suzanne, Michele, Natalie, Michèle’s two daughters, Emily and Stéphanie and Natalie’s son Jérémie.  We can’t all be there, but at times, train trips home have been rescheduled to not miss the “sewing day”.  Sometimes, we  talk more than we sew, but our “sewing day” always brings us together and gets us strength.

During the last 2 years, we had two new beginnings.  Emily began the Dionne  Quiltuplets blog.  Thank you very much Emily; you have done a great job.  The second acquisition is a long arm machine.  With the six of us and then one more, we figured out the cost of having others machine-quilt our quilts was more in the long run that owning our own long arm machine.  Last July, a Handiquilter long-arm machine was installed in Lise’s basement.  A big thanks to my mother for the joy that it has brought and will bring.  My father, who always encouraged our activities, would have loved to see us enjoy our time together.


The first quilt that I present is the first quilt that came off our long-arm machine (which has yet to be named).  I patched the top of the quilt using the Yellow Brick Road pattern and fabrics from the “Noteworthy” design.  Lise, Natalie and I all had a hand in the machine quilting. And when we were done, we all danced!!

I called this quilt "Creation".

“Creation”

P1010943P1010935

I called this quilt “Creation” because for me, after the dark days of missing my father, I felt alive creating something.  From my faith background, I love that God calls us to create beauty.  Although this is not the most stunning quilt you will see, to me, it has been created with love, healing and the most fond memories of my dad and friend.

Michèle


Joseph’s Coat WIP

I recently decided to start another hand sewn quilt. I like having something to do while I watch a movie, sit on the train or listen to the radio so I couldn’t resist a new project when I saw this quilt-along.

I used her instructions and made a lot of modifications, but I really liked the idea of preparing the pieces with fusible. I chose to cut out the pieces on Steam-A-Seam and iron the edges down to hold them in place instead of using glue. I spent a few weeks cutting out and ironing the pieces. The biggest challenge for me was getting accurate points, especially with thicker fabric.

Image

I wanted a rainbow effect, so I sorted the pieces out by colour, then laid them out in the pattern.

ImageImage

My plan is to applique the whole quilt with pearl cotton, and then use the thread to blend the colours during quilting. I ordered some wonderful thread from Valdani (size 12).

Image

I love the bright colours and I can’t wait to show my progress as I work on the applique!

– Emily


Hand-made runs in the family

Recently, ma tante L gave away some blankets that she had made. They are beautiful enough to be used as a decorative piece on their own! The Dionne Quiltuplets come from a long line of crafters, with previous generations working to quilt, weave, spin and knit to earn money, make things for the family and pass the time.

Today,  I’m happy to share some of our woven history!

– Emily

From ma tante L:

Image

Image

Image


From a great-grandmother who use to sell her blankets for $2:

Image


Detail of the pattern:


Image

Crossed Canoes

This is the first finished quilt post! Not first because it’s my first quilt (or even my most recent), but it’s the only one that I have pictures for. It’s a crossed canoe pattern with free motion quilting done on Elle’s longarm machine.

-Emily

With crossed paddles

With crossed paddles

Full pattern view

Full pattern view

Quilting detail

Quilting detail